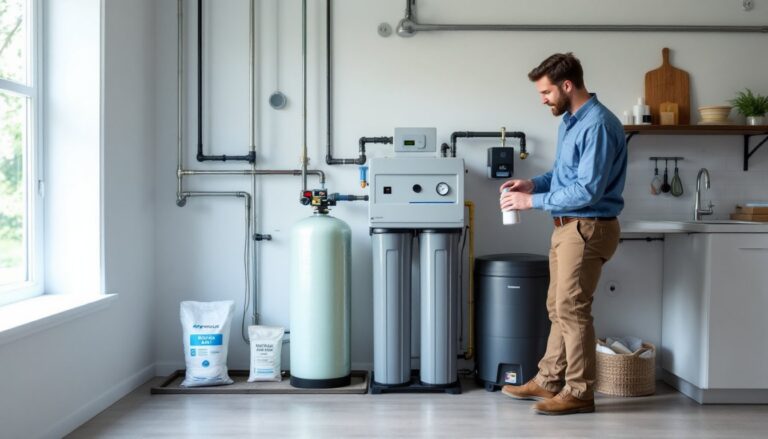
That chalky taste in your water? The ice that smells faintly of last week’s leftovers? Your KitchenAid refrigerator filter is probably overdue for a swap. Replacing it is one of the simplest maintenance tasks you can do, and it makes a real difference in water quality. Unlike some appliance repairs that require a pro, this is a five-minute job that doesn’t even need tools. Whether you’re trying to figure out which filter fits your model or you’ve got a new cartridge sitting on the counter and you’re not sure which way it twists, this guide walks through everything you need to know to keep your water clean and your ice fresh.
Table of Contents
ToggleKey Takeaways
- A KitchenAid refrigerator filter should be replaced every six months to remove contaminants like chlorine, lead, mercury, and pesticides that municipal treatment misses.
- Replacing your KitchenAid filter is a simple five-minute task without tools—locate the filter (upper corner, base grille, or interior wall), twist or push to remove the old cartridge, insert the new one, flush with 2-3 gallons of water, and reset the indicator light.
- Using OEM filters certified to NSF/ANSI standards 42 and 53 ensures reliable filtration; aftermarket options vary in quality, so verify certification before choosing a cheaper alternative.
- Signs your filter needs replacement include slower water flow, off-taste or odor in water or ice, cloudy water, and a red or orange indicator light—don’t wait for these warnings, as the filter loses effectiveness gradually.
- Common installation issues like air locks, leaks, or filters not locking are usually caused by improper O-ring seating, using the wrong model number, or forcing the cartridge; always double-check the part number and take your time during installation.
Why Your KitchenAid Refrigerator Filter Matters
Refrigerator water filters aren’t just about taste. They remove contaminants that standard municipal treatment doesn’t fully address: chlorine, lead, mercury, pesticides, and pharmaceuticals that can slip through older infrastructure. KitchenAid filters use activated carbon to trap these impurities, along with sediment that causes cloudiness.
Over time, that carbon becomes saturated. Once it’s full, it stops filtering effectively, and in some cases, trapped contaminants can leach back into your water. You’re not just drinking stale-tasting water: you’re potentially drinking what the filter was supposed to catch.
Beyond health, a clogged filter restricts water flow. That means slower dispensing, smaller ice cubes, and extra strain on the refrigerator’s water valve and pump. Replacing the filter on schedule protects both your family and your appliance. Independent testing by refrigerator water filter reviewers confirms that timely replacement is critical to maintaining filtration performance.
How to Identify the Right Filter for Your KitchenAid Model
KitchenAid uses several filter models depending on the refrigerator series and year. The most common are:
- Filter 1 (EDR1RXD1, W10295370): Side-by-side and bottom-freezer models
- Filter 2 (EDR2RXD1, W10413645A): French door and some side-by-side units
- Filter 3 (EDR3RXD1, 4396841): Older side-by-side models
- Filter 4 (EDR4RXD1, 469006): Select bottom-freezer and side-by-side refrigerators
The fastest way to confirm your filter model is to check the existing cartridge. Pull it out and look for the part number printed on the end cap or body. If it’s faded or you don’t have a filter installed, check the owner’s manual or the label inside the refrigerator (usually on the ceiling or side wall of the fresh food compartment).
You can also search by your refrigerator’s model number, which is stamped on a metal or adhesive tag inside the fridge, often near the crisper drawers or on the left side wall. Enter that model number on KitchenAid’s support site or a parts retailer, and it’ll match you to the correct filter.
OEM vs. aftermarket: KitchenAid-branded (OEM) filters are certified to NSF/ANSI standards 42 and 53, meaning they’ve been tested for chlorine reduction, lead removal, and other contaminants. Aftermarket filters vary widely in quality. Some meet the same standards and cost less: others don’t filter as effectively. If you go aftermarket, verify NSF certification and read reviews, cheaper isn’t always better when it comes to drinking water. Many lab-tested refrigerator water filters highlight performance differences between OEM and generic options.
Step-by-Step: Replacing Your KitchenAid Refrigerator Filter
Locating Your Filter
KitchenAid refrigerators place the filter in one of three spots, depending on the model:
- Upper right corner of the fresh food compartment (most French door and side-by-side models): Look for a small round or rectangular housing near the top.
- Base grille (some bottom-freezer models): The filter sits behind the toe-kick panel at the bottom of the fridge. You may need to pop off a small cap or pull a tab to access it.
- Inside the refrigerator, back left or right wall (older models): Less common, but some units mount the filter vertically along the interior sidewall.
Once you’ve located it, note which direction the housing opens or twists. There’s usually an indicator arrow or a push-button release.
Installation Process
Safety note: You don’t need to shut off water or unplug the fridge for a filter change, but keep a towel handy, there’s always a bit of residual water in the housing.
-
Remove the old filter. For twist-style housings, turn the filter counterclockwise about a quarter turn, then pull straight out. For push-button models, press the eject button and pull. If it’s stuck (common after six months), grip firmly and wiggle as you pull, don’t yank hard enough to crack the housing.
-
Prepare the new filter. Remove any protective caps or seals from both ends of the new cartridge. Some filters come with an O-ring pre-installed: make sure it’s seated properly in the groove, it creates the seal that prevents leaks.
-
Insert the new filter. Align the cartridge with the housing and push straight in until it stops. For twist models, turn clockwise until it locks (you’ll feel a click or resistance). For push-button models, push until the button pops out to the locked position.
-
Flush the system. Run two to three gallons of water through the dispenser before drinking or making ice. This clears out carbon fines (harmless black specks) and air pockets. It’ll take about five minutes of steady dispensing. The water may sputter or run cloudy at first, that’s normal.
-
Reset the filter indicator light. Most KitchenAid models have a filter status light on the dispenser panel. Press and hold the “Filter Reset” button (sometimes labeled “Light/Filter” or hidden behind a small icon) for three to five seconds until the light changes from red or orange to green or turns off. Consult your manual if you can’t find the button, some older models don’t have an indicator at all.
If you’re comparing options for your setup, top-rated refrigerator water filters offer insight into performance and compatibility across brands.
When to Replace Your Filter and How to Track It
KitchenAid recommends replacing the filter every six months, regardless of how much water you use. That’s based on the filter’s rated capacity, typically 200 to 300 gallons, and the gradual saturation of the activated carbon.
If you have a large household or use a lot of ice, you may hit capacity sooner. Signs it’s time to replace:
- Slower water flow from the dispenser
- Off taste or odor in water or ice
- Cloudy or discolored water
- Filter indicator light turns red or orange
Some people wait until they notice a problem, but by then the filter has already lost effectiveness. Set a calendar reminder for six months out, or use a sticker on the filter housing with the install date. Many smart home apps now include appliance maintenance trackers if you want a digital nudge.
Does running less water mean you can wait longer? Not really. Even if you’re not hitting the gallon limit, carbon filters can harbor bacteria in humid environments, and the material degrades over time. Six months is the ceiling, not a suggestion.
Troubleshooting Common KitchenAid Filter Issues
Water won’t dispense after filter change: You probably have an airlock. Run the dispenser for 10-15 seconds at a stretch, pausing briefly between attempts, until water flows steadily. If that doesn’t work, remove the filter, check that the O-ring is seated, and reinstall.
Leaking around the filter housing: The O-ring is either missing, damaged, or twisted during installation. Pull the filter, inspect the rubber gasket, and reseat it in the groove. If it’s torn, replacement O-rings are available from parts suppliers, don’t skip it or you’ll have a puddle in the crisper.
Black specks in the water: Carbon fines from a new filter. Keep flushing, they’re harmless, but annoying. If they persist after three gallons, the filter may be defective. Swap it for a new one.
Filter won’t lock into place: You might have the wrong model, or the housing tabs are damaged. Double-check the part number. If it’s correct and still won’t lock, inspect the housing for cracks (common if someone forced the last filter out). Replacing the housing usually requires a service call unless you’re comfortable sourcing the part and snaking it behind the fridge liner.
Indicator light won’t reset: Press and hold the button longer, some models need a full 10 seconds. If the light still doesn’t change, check your manual for a hidden reset sequence (some require pressing two buttons simultaneously). Worst case, the light module is faulty, but the filter will still work fine: it’s just a tracking nuisance.
Filter is expensive, can I skip it? Technically, yes. The fridge will still dispense unfiltered water. But you lose contaminate removal and risk buildup that clogs the valve. If cost is the issue, look for NSF-certified aftermarket filters or buy in bulk, six-packs often come with a discount.
Most filter problems come down to user error during installation or using the wrong part number. Take your time, double-check the model, and don’t force anything. If you’re replacing the filter on schedule and following the steps, you shouldn’t run into issues.